Library Creation
Libraries are nodes created by a group of nodes which can be re-used at other parts of the code. They are like functions in C language.
Libraries can take inputs and give outputs of data. Each library node is made available on the palette once created.
Steps
- We'll create a blink library as an example.
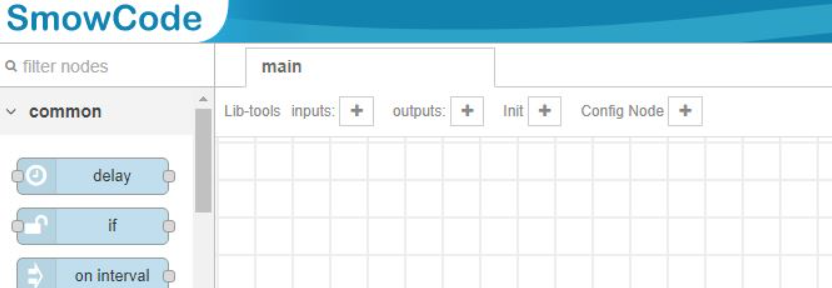
- Click + sign near input on the toolbar above the canvas area.
- Reposition the new
inputnode to centre. - Similarly add an
outputnode and reposition it. - Double click the output node to open its properties.
- Edit its label to eg. "Done".
- Click pencil icon button in New Library Name property.
- Set a name of your new library eg. "blink".
- Below Properties property, click Add button.
- Set name of the property, in our case keep it
pin. - Set its data type. In our case Integer of subtype uint8.
- Set its default value eg. "2".
- Click Add button to close editor of the new library.
- The new library will be selected in the
output node's properties. - Click Done button to close editor of the
output node. - Open properties of our
input node. - Ensure its New Library Name property is pointing to our "blink" library name.
- Click Done to save the suggested value of New Library Name.
Lets add actions to be performed by the library.
- Create a sequence of nodes between our
input nodeandoutput node:
input node -> pin write -> delay -> pin write -> output node
- Set Pin of the 1st
pin writenode aspin(corresponding to our library's property). - Set Level of the 1st
pin writenode as1(HIGH). - Similarly, for 2nd
pin writenode, make the propertiespinand0respectively. - Set Period of
delaynode as0.1(0.1s).
The Library is ready! Lets Use It.
- Find the library named "blink" in the left side palette. (Use it like a normal node)
- Create a flow:
on interval->blink. - Set Interval property of the
on intervalnode as1(1s). - Set Pin property of
blinknode as2(or any pin with an LED connected). - Use node properties the inside nodes.
- Compile and upload the code to your microcontroller board to see the blinking working.
Congratulations on creating your 1st library!
How to Send Data output from library
- Open properties of
output nodefrom the above example. - Click pencil icon button in New Library Name property.
- Below Output Props property, click Add button.
- Set index of the bubble you want an output data for. Eg.
0for the 1st bubble. - Set its name eg.
data. - Select its data type. Eg. uint8 (Integer).
- Add a node that creates a variable when added in the flow eg.
pin readnode. - Add the node between the
input nodeandoutput nodeof the library. Eg:input node-> ->other nodes->pin read->output node. - Open properties of
pin readnode. - Set properties of the node as wanted by you.
- Go to Outputs section of the properties.
- Set variable name of the Pin Level output prop to
dataso that it creates a variable named "data" which will be given as output of the library. - Done! You can now assign this variable to the node properties of the next connected nodes of
blinkwhere its used. - Use the output variable named "data" of the new
blinknode like any other normal node in your code.
Libraries currently don't support more than 1 output bubbles.
Names of Properties and Output Props of created new libraries shouldn't contain spaces or special characters. Names should start with an alphabet and the names can contain underscores "_" or numbers in them.
Init Node
Use an init node instead of an input node to create a flow (for your library) that executes during initialisation (setup) phase of the microcontroller's code execution. Ensure the New Libary Name property of the init node is pointing to the correct library. Flows created with init nodes shouldn't be ended with an output node.
Creating Different Node Types
| Activity Node | Event Node | Config Node | |
|---|---|---|---|
| Flow starts with | input node | Any Event type node | none |
| Flow ends with | output node | output node | none |
| #Input Bubbles | 1 | 0 | 0 |
| #Output Bubbles | 0/1 | 0/1 | 0 |
| Node Properties | ✓ | ✓ | ✓ |
| Output Properties | ✓ | ✓ | ✕ |